- General Principles
- Pages Types & Editing
- Calendar
- Directory
- Top & Bottom Navigation Menus
- Adding Timelines
Find below a detailed breakdown of the template types, content types, and how data is populated into templates.
General Principles
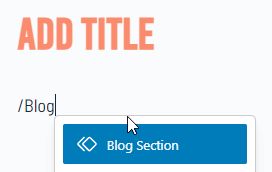
- New-Style Pages place all content inline, and if they have a Blog Section, the posts here are set via the Blog Section form at the bottom of the editor page.
- Legacy Pages have a top header that looks like New-Style Pages but only support the Featured Image setting from the editor. If additional content desired like New-Style Pages see Converting A Legacy Page
- Posts, Directory, and Calendar navigation and single post appearance / content are controlled through the Business and Event form fields in the editor. We suggest continuing to place all events, blog posts, and businesses in these sections to maintain consistent content structure and link structure for site usability + search engine crawling. As opposed to, for example, creating Pages for them.
Each major heading here corresponds to the named content section on the backend.
Pages
Legacy Pages
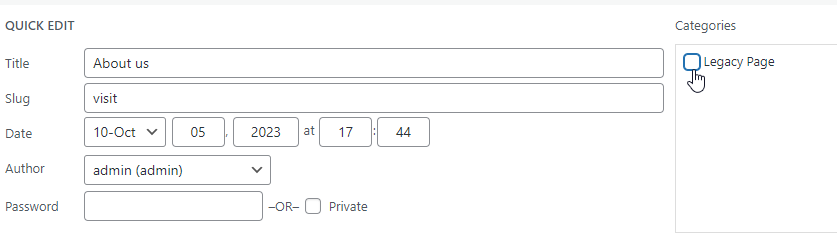
A legacy page has the Legacy Page category set in the Quick Edit on the Pages list:

This tells the templating system to add a basic new-style header above the existing page content.
Only the Featured Image and Title will be pulled into this template.
New-Style Landing Pages
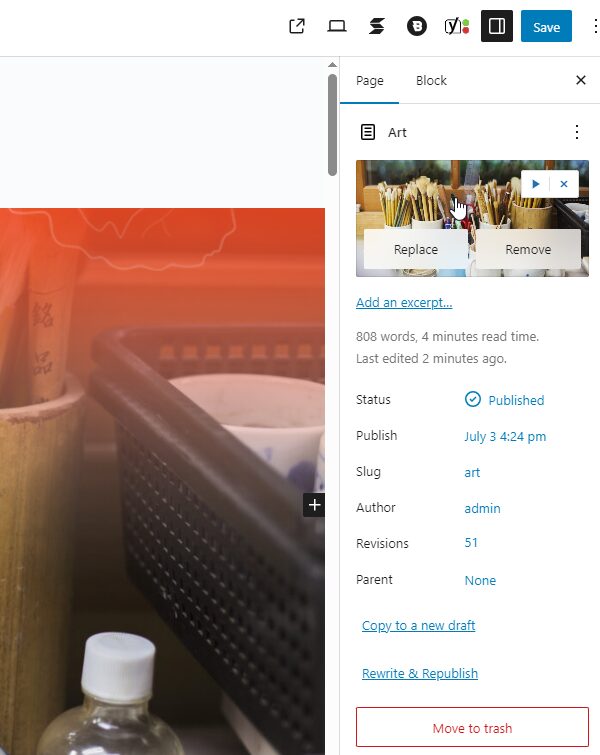
New-style landing pages like Art have the top header section inline and all images and text can be edited.
Editing a New-Style Landing Page
Top image w/ orange background, use the Featured Image setting. This also sets the SEO and social media image.
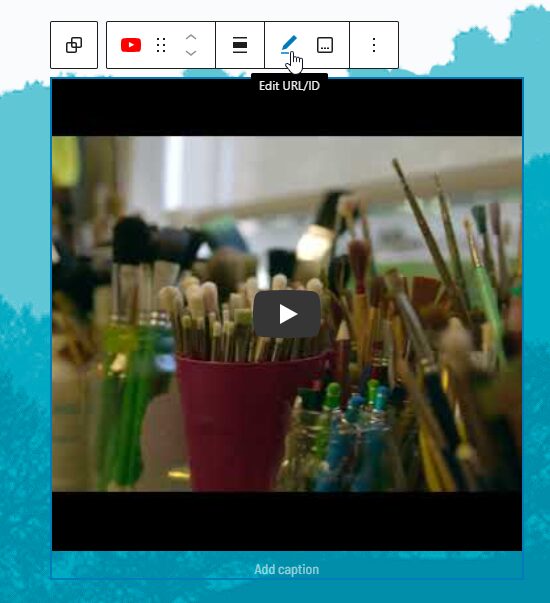
Blue section w/ title, description, and video or circle image:
Text can be edited by clicking – note that Title requires two clicks to edit text.
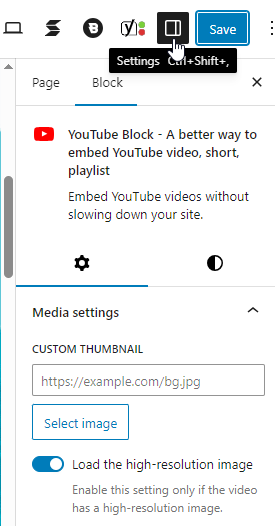
Video can be edited by clicking on the block and choosing the following, then pasting in a YouTube URL:
YouTube video block settings offer options to add a thumbnail, or load the video’s high resolution thumbnail:
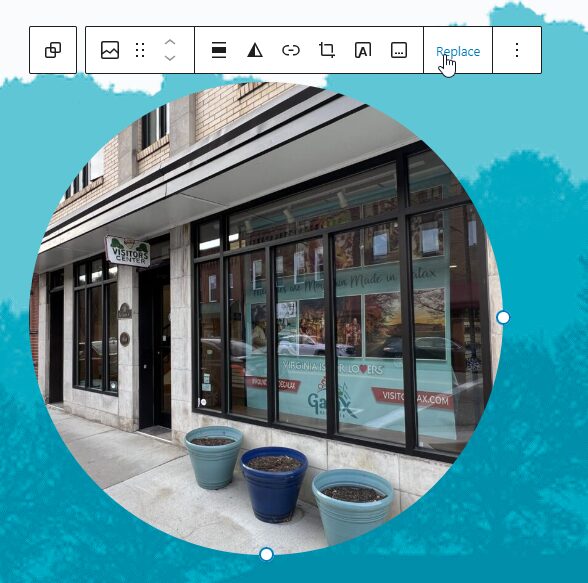
To edit an image-style section, click the Image block and choose “Replace:”
If the page has a blog section, this can be edited via the “Blog Section” form at the bottom of the page editor:
Adding A New-Style Landing Page
Go to Pages -> Add Page, and create the page with your desired title.
Then setup the page as follows:
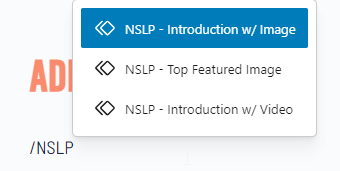
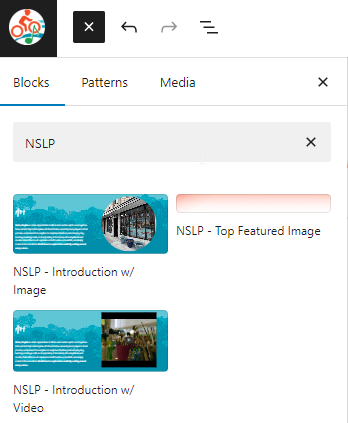
- Add the following block patterns:
- NSLP Top Featured Image
- NSLP Introduction w/ Image or NSLP Introduction w/ Video
- If you’d like a dynamic blog section, add a Blog Section
OR
Converting a Legacy Page
- Go to the page editor for the Page that you’re converting, and add the block patterns above at the top of the page like you’re creating a new page.
- Confirm the vertical spacing setting is set to default:

- After setting up the top header and saving the changes, go back to the page in the page list, then click Quick Edit and uncheck the Legacy Page category and click Update:
Home Page
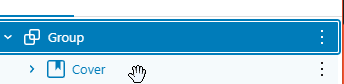
- Hero Image: The top hero image and pattern are layered. See the list view to see how this is structured. The group contains the picture, and the cover contains the pattern. The images can be found under the background image settings for the block:
- Video: The video can be changed, see the instructions in the previous section.
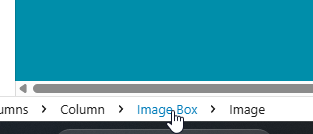
- Masonry links: The links in the masonry grid can be changed by clicking the item on the grid, then clicking to the “Image Box” block in the block hierarchy at the bottom:
Then go to Advanced -> Link in the block settings: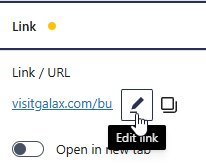
- Other blocks used throughout the block may use this style of link setting. You can usually tell by checking if the block icon at the top of the block settings panel is purple colored.
- Upcoming Events: The upcoming events section shows the next upcoming event in the Featured Events category, and all upcoming events below that.
- Footer: Editing the footer here will effect the footer on all pages on the site that use it.
Calendar
Single Events
The editor post fields correspond as follows:
- Featured Image: Shows at top of page.
- Gallery: Shows below featured image.
- Ticket URL: Used on the “Visit Website” button
- Events Section: Determines what upcoming events show with this event.
- Map: Set through Event Venue associated with the event. (See Calendar -> Event Venues section of backend)
Events Category
Go to Calendar -> Event Categories, you can add new categories from this screen, to add an image you’ll need to create the category, then click on it in the list to the right.

After clicking on a category in the list you’ll see these fields:
- Main Hero Image: Set featured image.
- Small Circle Image: Set icon / logo.
- Title: Determines what title shows in the category blue section.
- Description: Determines what text shows in the category blue section.
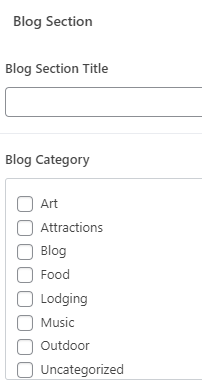
- Blog Section Title: Title to show in the randomized blog section.
- Blog Category: Category of blog posts to show.
Calendar Page
Go to Blocksy -> Content Blocks, then Calendar Header.
Directory
Single Businesses
Adding and editing these works essentially the same as the events, except that the Map is set via the tab on the business itself.
Business Category Pages
Adding and editing these works the same as editing business categories.
Top & Bottom Navigation Menus
Go to Blocksy -> Content Blocks, then find the item in the list called Modal Header. Click on the menu to see a list of links shown on the block settings on the right side.
For footer links, edit the footer on the home page, or via the Taxonomy / Single Footer content block.
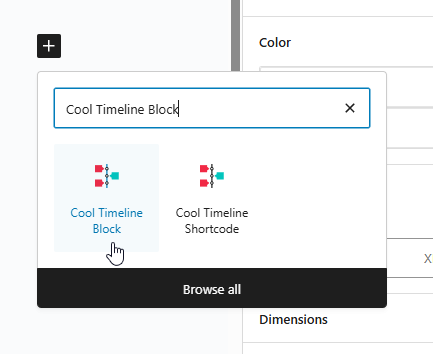
Adding Timelines
Ignore the Timeline Addons section in the backend, the best way to add timelines is via the Timeline block. You can add it directly into a page and edit a timeline visually: